 You bought zebra blinds that hang too long. Now you're stuck between paying someone to fix them or living with fabric pooling on your windowsill.
Here's what most installers won't mention upfront: zebra blinds can be shortened, but the process isn't straightforward. The dual-layer fabric design makes alterations trickier than standard roller shades. We'll show you when it's worth doing yourself and when you should pass the job to a pro.
Here's what we'll cover:
● Why zebra blinds are harder to shorten than regular shades
● The two main methods for trimming zebra blinds
● Step-by-step instructions for DIY shortening
● Common mistakes that ruin the fabric alignment
● When professional help saves you time and money
BlindsMagic's motorized zebra shades come made-to-measure, so you skip the headache of alterations altogether. Our shades arrive cut to your exact window dimensions—no trimming needed.
Why Zebra Blinds Are Harder to Shorten
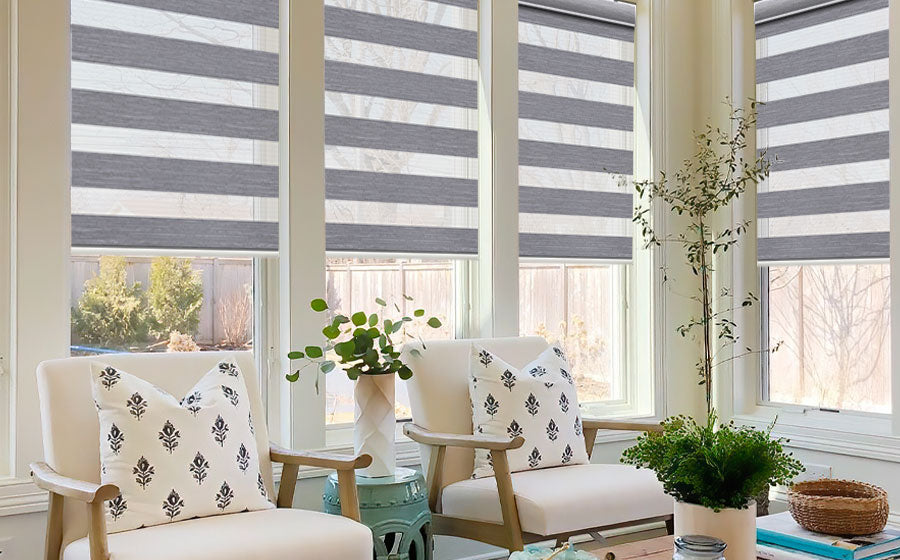
Zebra blinds aren't your average window covering. They feature two layers of fabric with alternating sheer and opaque stripes that overlap to control light. When you roll them up or down, these stripes need to align perfectly—or you lose the whole point of having them.
That's the problem with shortening them.
The Dual-Layer Design Problem
Cut a standard roller shade, and you're dealing with one continuous piece of fabric. Simple.
However, zebra blinds have a looped design where both fabric layers connect at the bottom. Trim them wrong, and the stripes fall out of sync. Your light-filtering bands won't match up anymore.
Think of it like hemming pants with a striped pattern. If you don't account for where the stripes fall, you'll end up with mismatched legs. Same concept, higher stakes—because you can't exactly hide window treatments behind a belt.
What Makes Alteration Tricky
● Dual-layer construction – Both fabric panels must stay aligned after cutting. One layer slightly longer than the other? Your shade hangs crooked.
● Stripe pattern matching – The sheer and solid bands need to line up precisely. Off by half an inch means your privacy bands won't close properly.
● Bottom rail attachment – The fabric loop connects to the rail in a specific way. Most use clips, adhesive, or a channel system that's not designed to be reopened.
● Tension balance – Uneven cuts throw off how smoothly the shade rolls. You'll get bunching on one side or fabric that won't retract evenly.
How It Differs From Regular Shades
|
Feature |
Standard Roller Shades |
Zebra Blinds |
|
Fabric layers |
Single continuous panel |
Two overlapping panels |
|
Bottom attachment |
Simple hem bar (slides out) |
Looped fabric with rail clips |
|
Cutting difficulty |
Low—straight cut works |
High—must maintain alignment |
|
Pattern concerns |
None (solid fabric) |
Stripes must stay synchronized |
|
Reinstallation |
Drop hem bar back in |
Reattach both layers precisely |
Standard roller shades use a hem bar that slides out. You cut the fabric, slide the bar back in, done.
Zebra blinds require you to maintain that dual-layer loop while shortening both panels equally. The fabric wraps around the bottom rail and secures with clips or adhesive. Remove it incorrectly, and you'll damage the material. Reattach it poorly, and the shade won't hang straight.
The Stripe Alignment Challenge
Here's where most DIYers mess up: measuring from the wrong reference point.
The stripes on zebra blinds aren't randomly placed. They're engineered to align at specific intervals. If you don't measure from the correct starting stripe, your previously aligned bands will be permanently offset.
No amount of adjusting will fix it once you've made the cut.
You need to account for the pattern repeat—the distance it takes for the stripe sequence to complete one full cycle. Cut mid-pattern, and you'll never get proper alignment again.
This is why ordering made-to-measure shades from the start saves you the trouble. BlindsMagic's zebra shades get custom-cut to your window specs before they ship—stripes aligned, tension balanced, ready to install. Our motorized options start at $179.99 and come with precise measurements baked in.
The Two Main Methods for Trimming
 You've got two options when shortening zebra blinds: the bottom-up method and the top-down method. Each has its place depending on your situation.
Bottom-Up Method (Most Common)
This approach removes fabric from the bottom rail. You detach the bottom rail, trim both fabric layers equally, then reattach the rail.
● Best for: Minor adjustments (1-3 inches) where you need to maintain the existing roll mechanism and headrail position.
● Pros: Keeps your mounting hardware untouched. The shade continues to roll from the same position.
● Cons: Harder to execute cleanly. You're working with the most complex part of the blind—where both fabric layers connect.
Top-Down Method (Less Common)
This removes fabric from the headrail end. You detach the fabric from the roller tube, cut from the top, then reattach.
● Best for: Larger adjustments (3+ inches) or when the bottom rail mechanism is too complicated to disassemble.
● Pros: Easier access to cutting point. No need to mess with bottom rail clips.
● Cons: Changes where the fabric starts on the roller. Can affect how much shade material is visible when fully raised.
Most people default to the bottom-up method because it keeps the shade's rolling action consistent. But if you're staring at a bottom rail held together with industrial adhesive, the top-down approach might save you a headache.
Pro tip: Take photos before you start. Document how the fabric attaches at both ends. You'll thank yourself during reassembly.
Or skip the whole ordeal. BlindsMagic's made-to-measure zebra shades arrive cut to your exact specs—no trimming required. We offer 80% blackout linen options and 65% blackout styles, all with smart motorization built in.
Step-by-Step Instructions for DIY Shortening
Ready to tackle this yourself? Here's the process for the bottom-up method. Set aside 45-60 minutes and work on a clean, flat surface.
What You'll Need
● Measuring tape
● Scissors or a fabric cutting tool
● Screwdriver or pliers (for rail clips)
● Masking tape
● Marker or fabric pen
● Level
The Process
Step 1: Measure twice, cut once
Measure how much you need to remove. Add your measurement to the current length and mark where the new bottom should be. Use masking tape to mark both fabric layers.
Check that your cutting line falls on a matching stripe pattern. If not, adjust by one pattern repeat.
Step 2: Remove the bottom rail
Lay the shade flat. Examine how the fabric attaches—clips, adhesive, or a channel system.
For clips: Use pliers to gently pry them open. For adhesive: Carefully peel the fabric away (heat from a hairdryer helps). For channels: Slide the fabric out from the groove.
Step 3: Cut both layers equally
Fold the shade so both fabric layers align perfectly. Cut straight across using your marked line.
Double-check that both layers are the same length before moving forward. Hold them up and let them hang naturally.
Step 4: Reattach the bottom rail
If using clips, snap them back onto the fabric edge. If using adhesive, apply a thin, even line and press firmly. If using a channel, slide the fabric back in and secure the end caps.
Step 5: Test the shade
Hang it back up. Roll it up and down several times. Check that the stripes align properly when closed.
If something's off, you'll know immediately. The shade either hangs crooked or the stripes don't sync up.
Reality check: This process sounds straightforward on paper. Execution is trickier. If you're not confident working with fabric or don't have steady hands, consider professional installation from the start with BlindsMagic's custom-sized shades.
Common Mistakes That Ruin Alignment
Most failed DIY attempts come down to four mistakes. Avoid these and you'll dramatically increase your success rate.
Cutting Without Pattern Reference
You measured the length. Great. But did you account for where the stripe pattern falls?
Cutting mid-pattern throws off the entire alignment. The stripes that used to line up perfectly now sit half an inch apart. You can't fix this after the fact.
The fix: Always measure from a reference stripe—preferably a bold opaque band. Count pattern repeats to ensure your cut falls at the same point in the cycle.
Uneven Layer Cutting
One fabric layer ends up slightly longer than the other. Now the shade twists when you roll it up.
This happens when you cut the layers separately or don't keep them aligned during cutting. Even a quarter-inch difference creates problems.
The fix: Fold the shade so both layers sit perfectly on top of each other. Clamp them together with binder clips before cutting. One clean cut through both layers.
Bottom Rail Reattachment Fails
You got the cutting right, but now the rail won't stay attached. Or it's crooked. Or the fabric bunches up on one side.
Most people rush this step. They don't clean off old adhesive, they don't measure the rail position, or they don't apply even pressure across the entire width.
The fix: Take your time here. Clean surfaces thoroughly. Measure twice to ensure the rail sits level. Apply adhesive or clips evenly across the full width. Let the adhesive cure completely before hanging.
Ignoring Tension Issues
The shade rolls up fine but hangs loose. Or it's too tight and won't lower smoothly.
Shortening changes the fabric-to-roller ratio. If you removed significant length, the tension might need adjustment.
The fix: Most zebra blinds don't have user-adjustable tension systems. This is where DIY hits its limits.
Skip these headaches with BlindsMagic's precision-cut shades. Our motorized zebra blinds come with balanced tension right out of the box, plus a 3-year warranty if anything goes wrong.
When Professional Help Saves Time and Money
 Some situations scream "call a pro." Here's when DIY crosses into risky territory.
You're Removing More Than 3 Inches
Small adjustments are manageable. Big ones multiply the risk of misalignment, tension problems, and pattern disruption.
A professional has the tools and experience to handle major alterations without destroying the shade. They'll know whether your specific blind can even be shortened that much.
The Bottom Rail Uses Industrial Adhesive
If your bottom rail is glued on with commercial-grade adhesive, you're looking at a nightmare scenario. That stuff doesn't peel off cleanly.
Pros have heat guns, solvents, and techniques for removing industrial adhesive without damaging the fabric. You don't.
Your Shades Cost $300+
Expensive shades deserve professional handling. One mistake costs you the full replacement price.
Do the math: professional alteration runs $50-150 depending on your area. Replacing a high-end shade costs 2-3x that amount. Easy decision.
You Need Multiple Shades Adjusted
One shade? Maybe worth the DIY attempt. Five shades across your house? That's hours of work with multiple failure points.
Professionals work faster and guarantee consistent results across all your windows. Batch jobs often come with per-unit discounts, too.
The Smart Move: Order Custom From the Start
Here's the truth installers won't tell you upfront: most alteration headaches disappear when you order made-to-measure shades initially.
BlindsMagic's zebra shades ship custom-cut to your exact window dimensions. Measure once, order, install. No trimming, no alignment issues, no wasted weekends.
Our motorized options integrate with Alexa, Google Home, and HomeKit. Free shipping, 30-day returns, and a 3-year warranty mean you're covered if anything goes sideways. Prices start at $179.99—competitive with stock sizes that'll need professional alteration anyway.
Get Perfect-Fit Zebra Blinds With BlindsMagic
Yes, zebra blinds can be shortened—but it's not a weekend project for everyone. The dual-layer design, stripe alignment, and bottom rail reattachment make this trickier than standard roller shades. Know your limits before you start cutting.
Key takeaways:
● Zebra blinds have two fabric layers that must stay aligned during alterations
● Bottom-up method works for small adjustments; top-down for larger cuts
● Always measure from a reference stripe to maintain pattern alignment
● Cut both layers together in one pass to avoid uneven lengths
● Professional help makes sense for adjustments over 3 inches or expensive shades
Shortening existing shades is possible, but ordering made-to-measure eliminates the risk entirely. BlindsMagic's custom zebra shades arrive cut to your exact window dimensions—stripes aligned, tension balanced, motorization included. No cutting tools required, just push-clip installation and smart home control from day one.

